 Quick Steps to a Photo Book Project
It's virtually a piece of cake to create your first photo book in Artisan. All you need besides Artisan are photos, your imagination. It's ten easy steps between beginning and publishing a project.
But just like learning to bake, you will find yourself getting more daring with the ingredients the more you do it! This section is intended to help you start off simple. With experience, Artisan Help and Forever Support, your projects can increase in complexity.
Here are the basic steps for building a photo book project in Artisan:
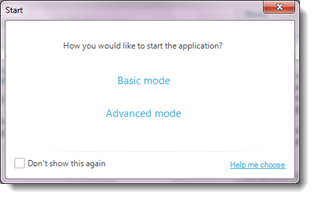
- Launch Artisan.
A Start dialog box appears asking if you want to launch in Basic Mode or Advanced Mode.
- Click Basic Mode (later, you can find for more information on Basic and Advanced modes, see Artisan Workspace-Your Digital Craft Room).
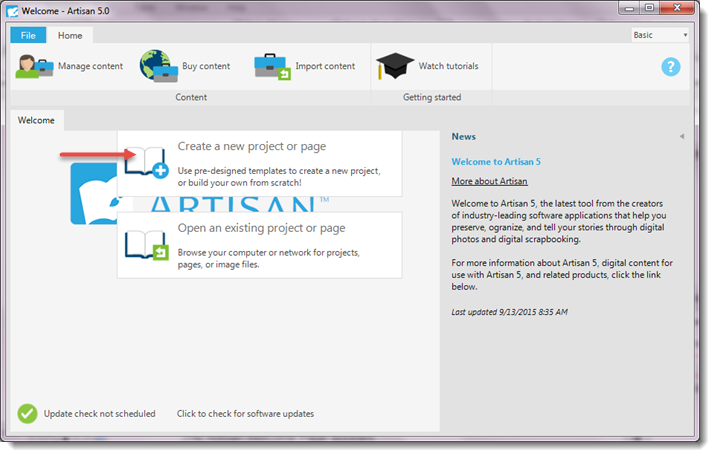
The Artisan Welcome Page appears.
- Click Create a New Project.
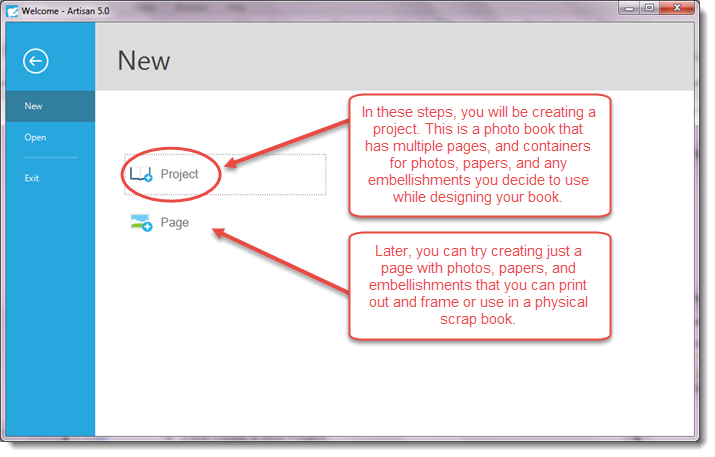
The Project Wizard window appears asking you if you would like to create a project or page.
- Click Project.
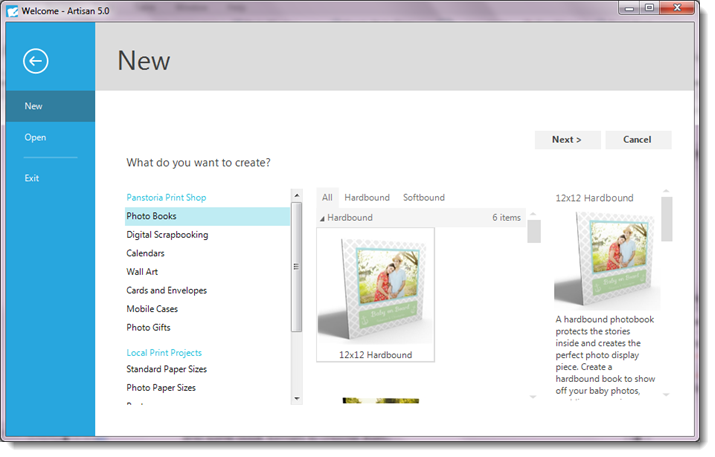
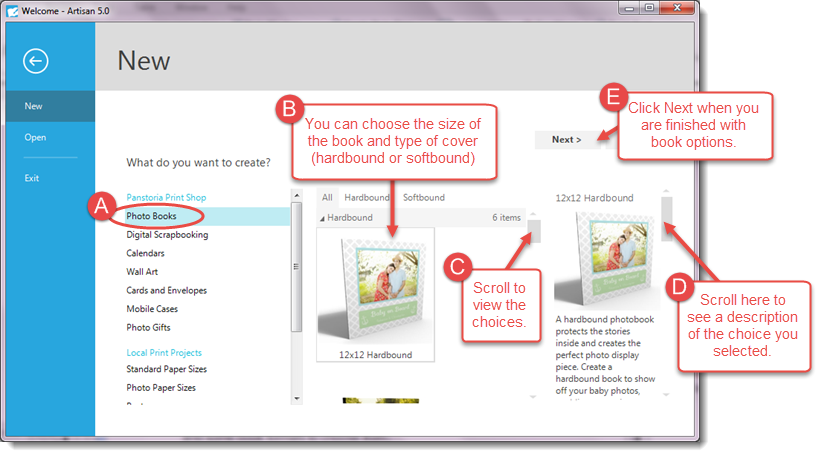
The Forever Print Shop window appears with Photo Books already selected and some book formats to choose from.
- Follow the directions in the diagram below to select your photo book options on this window.

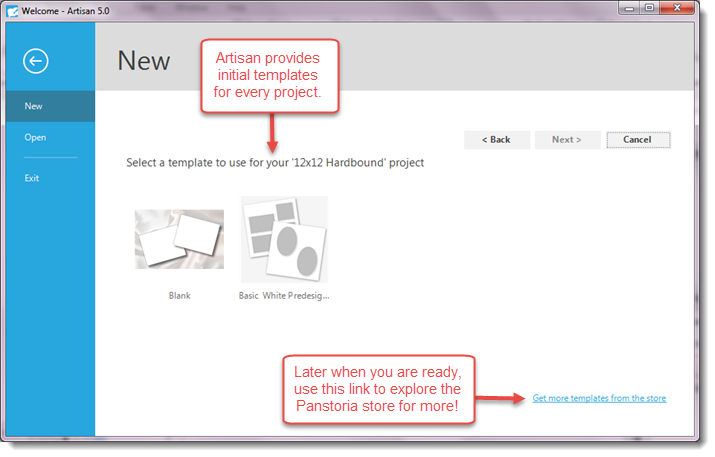
The Templates step in the Project Wizard displays.
- Click to select a template, then click Next.
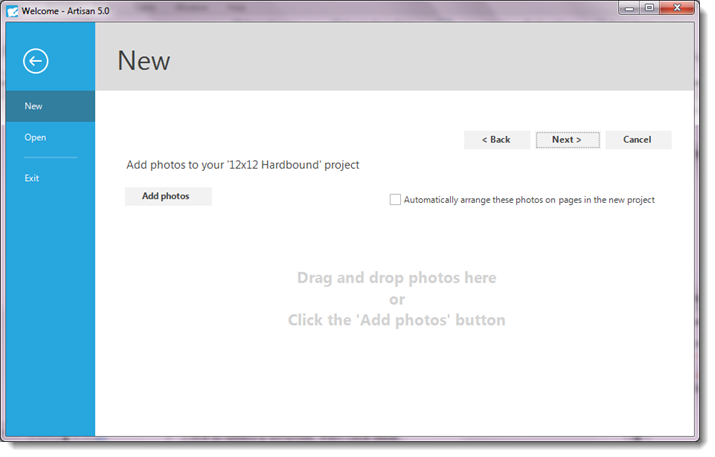
The Photos step in the Project Wizard displays.
- Click Add Photos, then From my computer.
The Get Images dialog box appears.
- Navigate to, and select the photos you want to include in your project (use your SHIFT or CTRL keys to multi-select), then click Open.

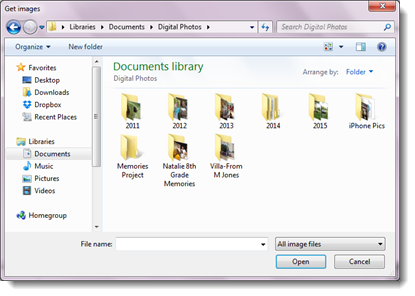
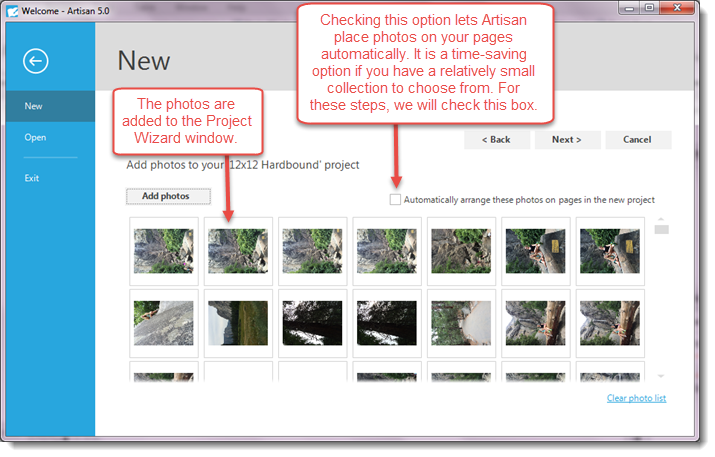
Note: Knowing where your photos are stored, per step 1, will make this step go faster! Also, it may be impossible to determine which are your best shots from the thumbnail images in this dialog box. You can always add all the photos from the folder using your SHIFT key to multi-select. Then remove the not-so-awesome shots from your project later.
- Click Next.
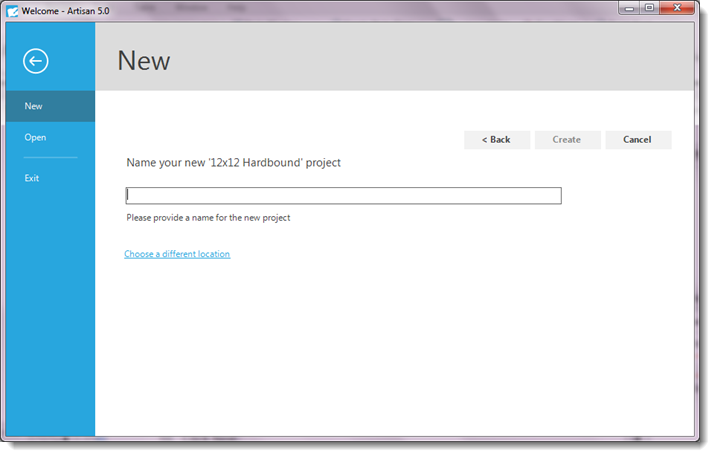
The next step prompts you to name your photo book.
- Type a name in the text box, and click Create.
A status box appears as you wait for Artisan to complete your project.
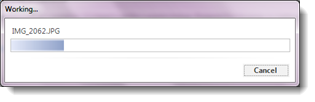
Note: This may take a few minutes, depending on the number of photos you chose. Artisan will fill up the template with as many of the photos as possible, up to the maximum number of pages (99).
Note: See Now What? for ideas on what to do next to your project.
 Now What?
Once your photos are all placed, your project opens to allow you to edit and format your pages. 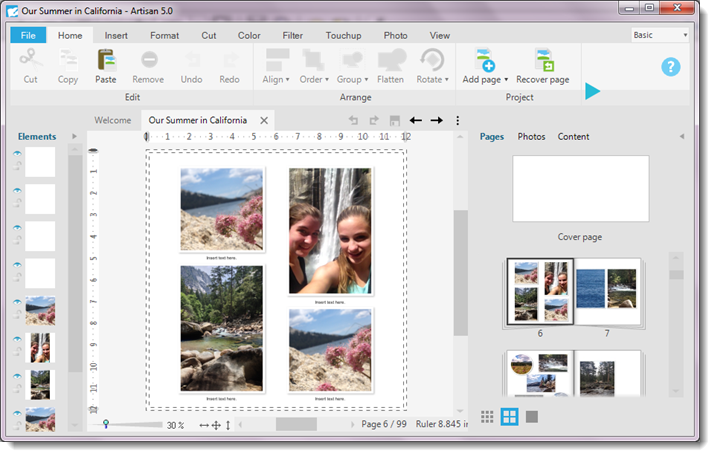
Basically, you have just created a vanilla cake with no icing or decorations. Here is where Artisan gets fun! The following table provides a "map" of formatting options that you can pursue from here. If you get overwhelmed, it's easy to put your project away and come back to it. Happy decorating!
| What You Can Do | What it looks like | Where to Find Out More |
|---|---|---|
| Place a decorative paper on a page background | 
|
Working with Colors and Fills |
| Create and stylize captions for photos | 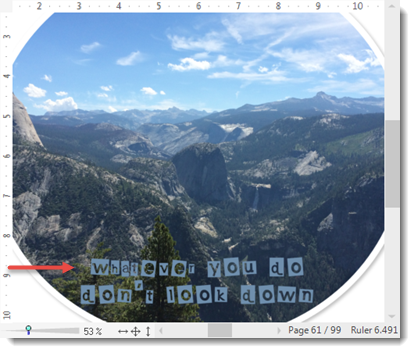
|
Working with a Text Box |
| Adjust photos (zoom, crop, swap out) | 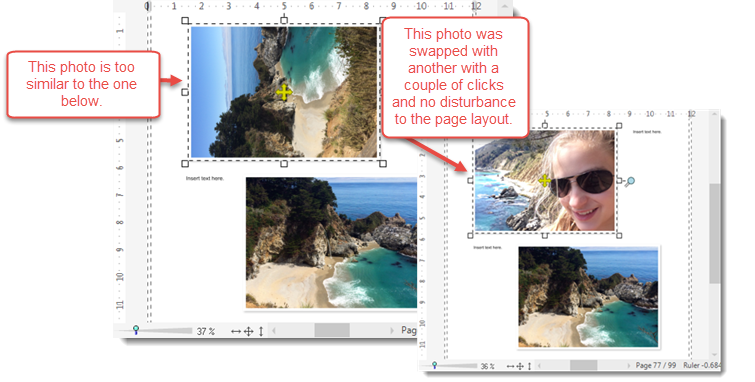
|
Working with Photos and Images |
| Add a mat to a photo | 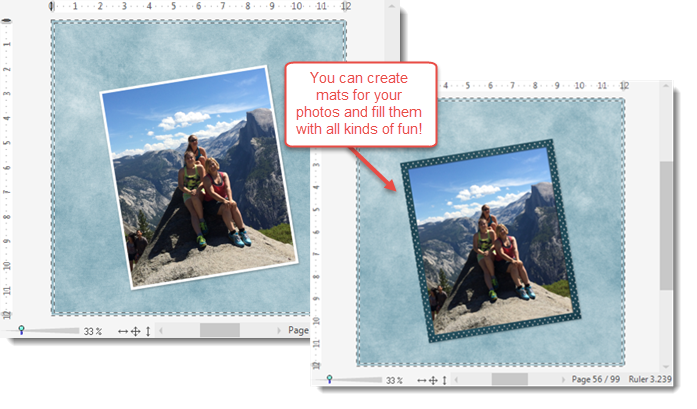
|
Working with Frames and Mats |
| Add embellishments to a page | 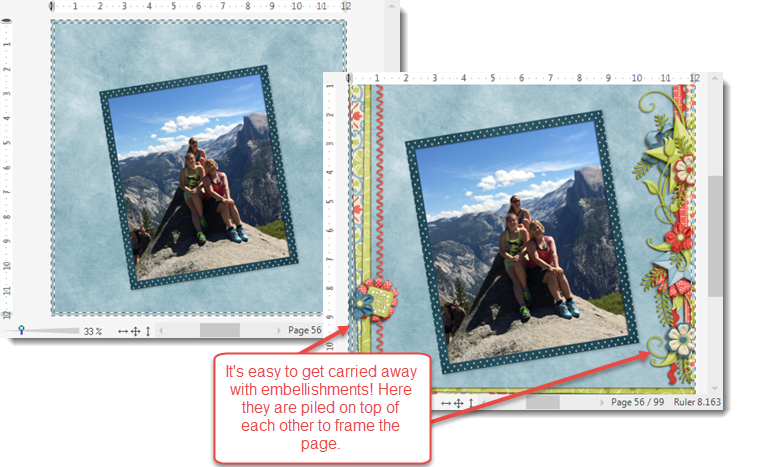
|
Working with Elements |
| Draw shapes on a page | 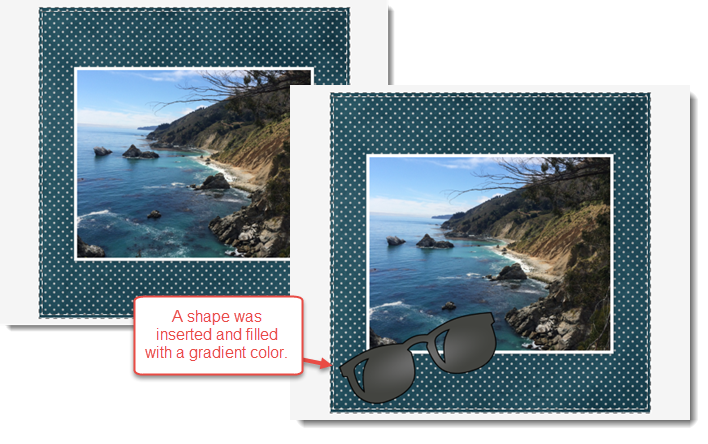
|
Working with Shapes |
| Use fancy alpha sets for titles or quotes | 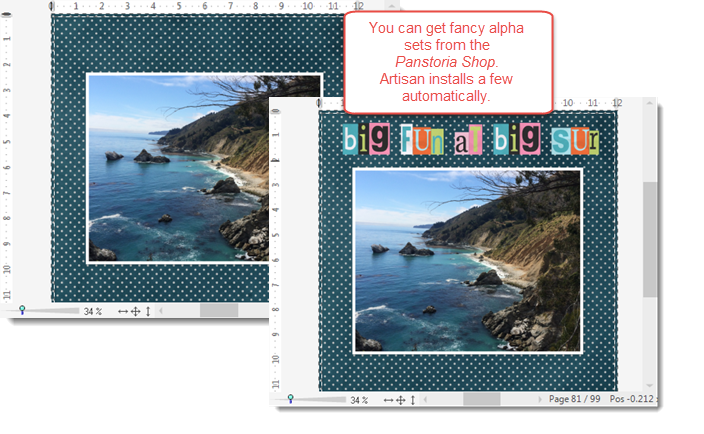
|
Working with Fancy Alphabet Sets |
| Apply cool cuts to your photos | 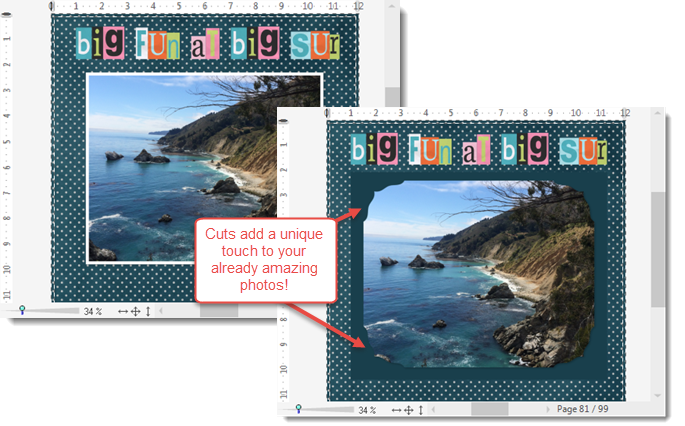
|
Working with Cuts |
| Add artsy filters to your photos | 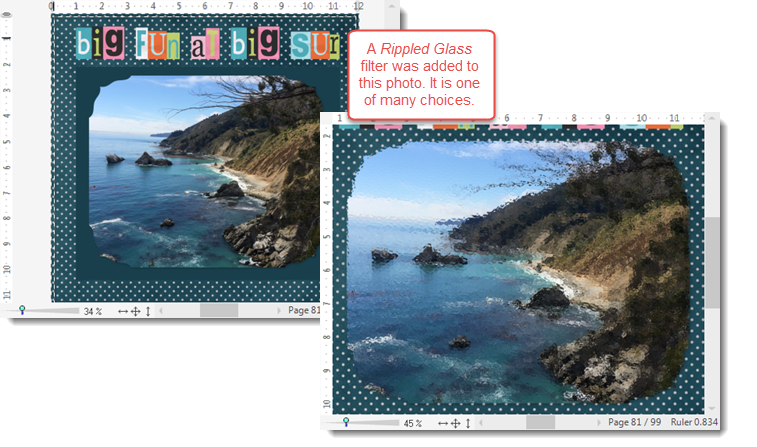
|
Applying Filters |
| Get more stuff and organize it like a pro | 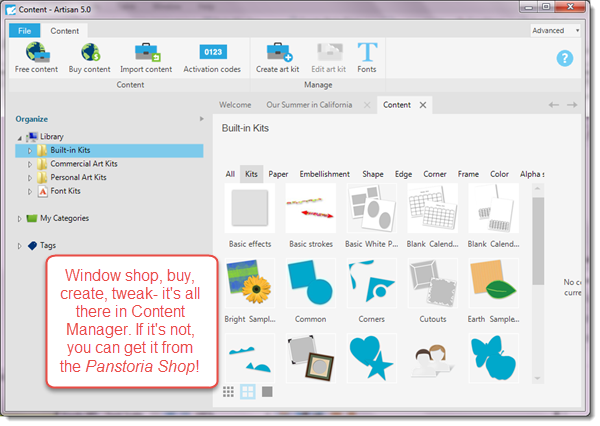
|
How to Purchase and Download an Art Kit |
Note: Remember to browse Artisan Help for other interesting features. Also, search for Artisan on Pinterest for ideas from other users like you!
Note: The section Previewing and Printing Your Final Project covers printing and ordering copies of your project.